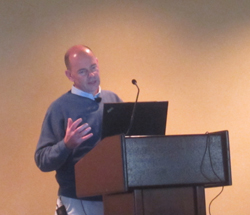
At major EDA events, CEDA (the IEEE council on EDA, I guess you already know what that bit stands for) hosts a lunch and presentation for attendees and others. This week was ICCAD and the speaker was Lars Liebmann of IBM on The Escalating Design Impact of Resolution-Challenged Lithography. Lars decided to give us a whirlwind tour of the history of recent lithography. I’ll summarize things here and talk about some of the future technologies and challenges that he described in a later blog.
Lars started by presenting what he called the Rosetta Stone of lithography. This summarizes the past challenges survived and the future challenges to come in a single slide. Almost anything you need to know about lithography as an EDA professional is on this one slide. One important thing to realize is that process names are increasingly just names. The critical thing is what is the minimum pitch that is allowed on the layer. For example, at 22nm the minimum pitch is 80nm. At 10nm the minimum pitch is 48nm.
The fundamental equation of lithography is that the resolution (always talked about as the half-pitch) is k[SUB]1[/SUB] * lambda / NA, where
- k[SUB]1[/SUB] is the Rayleigh parameter, which is a measure of the lithography complexity. Yield is affected if it drops below 0.65 and then we need to do something about it (such as OPC or double patterning, but that story is yet to come)
- NA is the numerical aperture, which is the sine of the largest diffracted angle captured by the lens. It is hard to scale since lens manufacture is hard for NA>0.5 but worse, the depth of field scales NA[SUP]-2[/SUP] making planarity of the wafer more and more critical
- lambda is the wavelength of light, which for many years has been 193nm.
The actual pitch is twice this number. So if the number is 100 then you can have metal (or whatever) at 100nm width and 100nm space (or two numbers that are close but add up to 200).
In the early days of semiconductor manufacturing, before this Rosetta Stone even begins, we scaled by scaling lambda, the wavelength of the light we used. First we used G-line at 436nm and then in 1984 went to I-line at 365nm. In 1989 we switched to KrF light sources at 248nm and in 2001 to ArF at 193nm. We then expected to go to F[SUB]2[/SUB] at 157nm but that never happened. It was too difficult to build effective optics and masks. And by the time we though about Ar[SUB]2[/SUB] at 126nm that already required full vacuum and reflective optics so why not go all the way to X-rays (EUV is at 14nm wavelength). So we have been stuck at 193nm light since 2001, as you can see on the 3rd line down on the Rosetta Stone, the one that only has one entry.
The slides starts at 130nm which was the first time that we used 193nm light. At that point we could use conventional lithography without doing anything unusual: flash the light through the reticle onto the wafer without really more than rudimentary correction on the mask. Since then we have had to scale using NA and k[SUB]1[/SUB] down to 28nm and which point scaling NA ran into the wall since it was impossible to manufacture lenses, and we were left with only being able to scale k[SUB]1[/SUB].
At 90nm we needed powerful optical proximity correction (OPC) essentially turning the masks into less of a mask and more of a diffraction grating where the light that got through interfered in just the way we wanted to give us something approaching the pattern we required. We couldn’t make square corners, the OPC is a sort of low-pass filter, but we could live with rounded corners and vias that were more circular than square. But OPC couldn’t correct everything so from an EDA point of view we needed tools to check the design, locate hot-spots that OPC would fail to correct, and get the designer to fix them.
From 65nm to 32nm we used off-axis illumination and asymmetric illumination. Without going into all the details, one of the inputs into the equation of to what angle to tilt the illumination is the pitch of the patterns on the wafer. So for DRAM not such a big issue but for logic we had to have a lot of rules about the dominant direction on a layer and increasingly complicated design rules since not all pitches were allowed any more. This was also when immersion lithography was introduced which got us down to 32nm.
To get us the next process generation to 22nm (80nm pitch) off-axis illumination and immersion lithography was no longer enough. For layers that didn’t only have patterns in one direction, we needed double exposure, one mask for the horizontal patterns and one for the vertical. However, still only one photoresist step and one etch step. The rules about prohibited pitches became more complex leading to unbelievably huge design rule decks.
80nm pitch is the least we can get out of the optical system. To go further we need to go to double patterning (DP), what lithographers call LELE (litho-etch-litho-etch). In principle this should take us down to 40nm but since the two masks used in double patterning are not self-aligned, we need to give up 10nm for those errors and 50nm is the smallest we can get with double patterning. I have written in detail about double patterning on Semiwiki here.
There is also triple patterning TP, (called LE[SUP]3[/SUP] by the lithographers). But this is not used to increase resolution (it isn’t really possible to use it that way) but rather to get better 2D resolution. But this leads to some big issues in EDA such as how to communicate complex structures that cannot be 3-colored.
Another type of double patterning is what IBM calls sidewall image transfer and what many people call SADP for self-aligned double patterning. In this the two separate patterns in DP are constructed in a way that removes that 10nm penalty. A mandrel is constructed using a single mask, and then it used to build sidewalls on each side of the mandrel. The mandrel is removed leaving everything at the desired pitch. Another wrinkle is that it is no longer possible to build anything other than gratings with no ends. A separate cut-mask is required to divide these up. In fact this approach is also used on some critical layers even with LELE DP. If you have ever seen any 20nm layout, that is why it looks so regular: only certain pitches are allowed and the lines have to be continuous and then cut.
Another problem is that the area that we need to inspect for interactions increases. Actually, of course, the area actually remains the same but the number of patterns drawn into the area increases. So from the point of view of someone sitting in front of a layout editor, more and more polygons need to be considered. In particular, it is no longer just the nearest neighbor but the next one over too. This causes big problems when cells are placed next to each other since the interaction area stretches deeper into the cell. Further, vias, which used to simply be colored the same as the metal they contacted, can interact over greater distance and so need to be actively colored leading to more complexity in the routes.
So this is where we are today. First generation multiple patterning required only a few levels using LELE (DP). Cell-to-cell interactions could be managed through simple rules. As we go to 10nm we will have more layers using LELE, a few levels using LE[SUP]3[/SUP] (TP). Then a few levels needed SADP. With lots of complex cell-to-cell interfactions.
That’s enough for one blog. More next week.
The presentation and a video of the talk should be here on the CEDA website when it eventually gets published.
More articles by Paul McLellan…


A Century of Miracles: From the FET’s Inception to the Horizons Ahead