FPGA-based prototyping has provided a major advance in verification and validation for complex hardware/software systems but even its most fervent proponents would admit that setup is not exactly push-button. It’s not uncommon to hear of weeks to setup a prototype or of the prototype finally being ready after you tape-out. Which may not be a problem if the only goal is to give the software team a development/test platform until silicon comes back, but you’d better hope you don’t find a hardware problem during that testing.
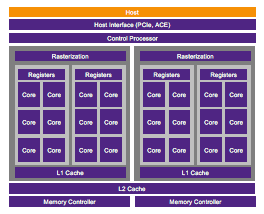
It doesn’t have to be this way. Yes, prototype setup is more complex than for simulation or emulation but a systematic methodology can minimize this overhead and start delivering value much faster. A great stress-test for this principle is a GPU since there are few designs more complex today; any methodology that will work well on this class of design will almost certainly help for other designs. Synopsys recently presented a webinar on a methodology to prototype GPUs using HAPS.
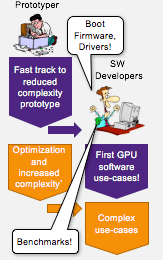
Paul Owens (TMM at Synopsys) kicks off with guidance on schedule management / risk reduction which should be second nature to any seasoned engineer, but it’s amazing how quickly we all forget this under pressure. You should bring the design up piecewise, first proving out interfaces and basic boot, then you add a significantly scaled-down configuration of cores (for this class of design with scalable arrays of cores) and only towards the end to you start to worry about optimization. These bring-up steps can cycle much faster than the whole design.
With that in mind, start with a design review – not of the correctness of the design but it’s readiness to 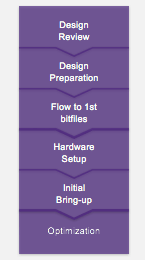 be mapped to the prototyper. This is platform-independent stuff – what are you going to do with black-boxes, behavioral models, simulation-only code, how are you going to map memories, what is a rough partitioning of the design that makes sense to you?
Next you should start thinking about requirements to map the design to the prototype and how you’re going to adapt with minimal effort when you get new design drops. Here’s where you want to work on simplifying clocks, merging clock muxes and making clocks synchronous. You may also want to add logic to more easily control boot. Paul recommends separating such changes for the main design RTL to the greatest extent possibly to simplify adapting to new drops.
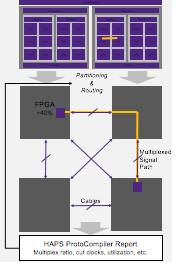
Paul’s next step is preparing first bitfiles, with a strong recommendation to start with low utilization (40-50% of resources) with automatic partitioning. That may seem self-serving, but you should ask yourself whether you’d rather save money on a smaller prototyper and spend more time fighting to fit your design or spend more time in debug and validation. Designs aren’t going to get smaller so you might as well cough up now because it will speed setup and you’ll need that capacity later anyway. Obvious things to look for and optimize here are multi-chip clock paths (leading to excess skew) and multi-chip paths in general. Paul also suggests that while you can start with an early version of the RTL, you should wait for a frozen drop before considering FPGA place and route because this takes quite a long time.
One point Paul stresses is that you should be planning debug already at this stage, particularly when you’re working with a scaled down design. Generous debug selections will greatly simplify debugging when you get around to bring-up.
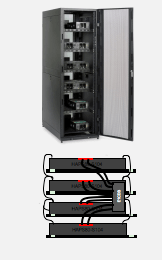
For prototype setup Paul suggests a number of best practices including a lockable lab to keep the curious out, adequate power supplies, ESD protection, disciplined cabling and smoke testing (i.e. general lab best practices). For initial bring-up he notes that the biggest challenge often is getting the design through reset and boot. Multiple interfaces exacerbate this problem – that’s why you should put effort into checking those interfaces earlier.
When you’re done with all of this, then you can look at optimization. Here you should consider timing constraint cleanup and possibly partitioning optimization. But Paul adds that in his experience it is difficult to improve significantly on partitioning over what the automatic partitioner will deliver, however changing partitioner options, cable layout and some other factors can have significant impact.
Finally you move on to system verification and validation! Overall, I think you’ll find this approach is a very practical and useful exposition of how to get through prototype bring-up with a minimum of fuss and maybe have feedback from prototype V&V actually have impact on design before tapeout 😎. You can see the full webinar HERE.
Share this post via:


Comments
There are no comments yet.
You must register or log in to view/post comments.